Integrating with iOS Apps
Rock helps you package your React Native code into files that your iOS and Android apps can use. For iOS, it creates a .xcframework file that you can easily add to your app.
To add React Native to your iOS app, we'll package your React Native code into an XCFramework. This way, you don't need to set up Node.js or CocoaPods in your main app.
To make the integration simpler and more powerful, we'll use the React Native Brownfield library.
Creating a New Rock Project (Automated)
If you are creating a new Rock project, you can select the brownfield-ios plugin:
to add brownfield capabilities, install dependencies. Then jump to:
Integrating to An Existing Rock Project (Manual)
If you have an existing Rock project, follow the instructions below.
1. Create a New Framework in React Native app's Xcode:
-
Open your React Native project's
ios/<project_name>.xcworkspacein Xcode -
Add a new target by clicking File > New > Target
-
Choose the
Frameworktemplate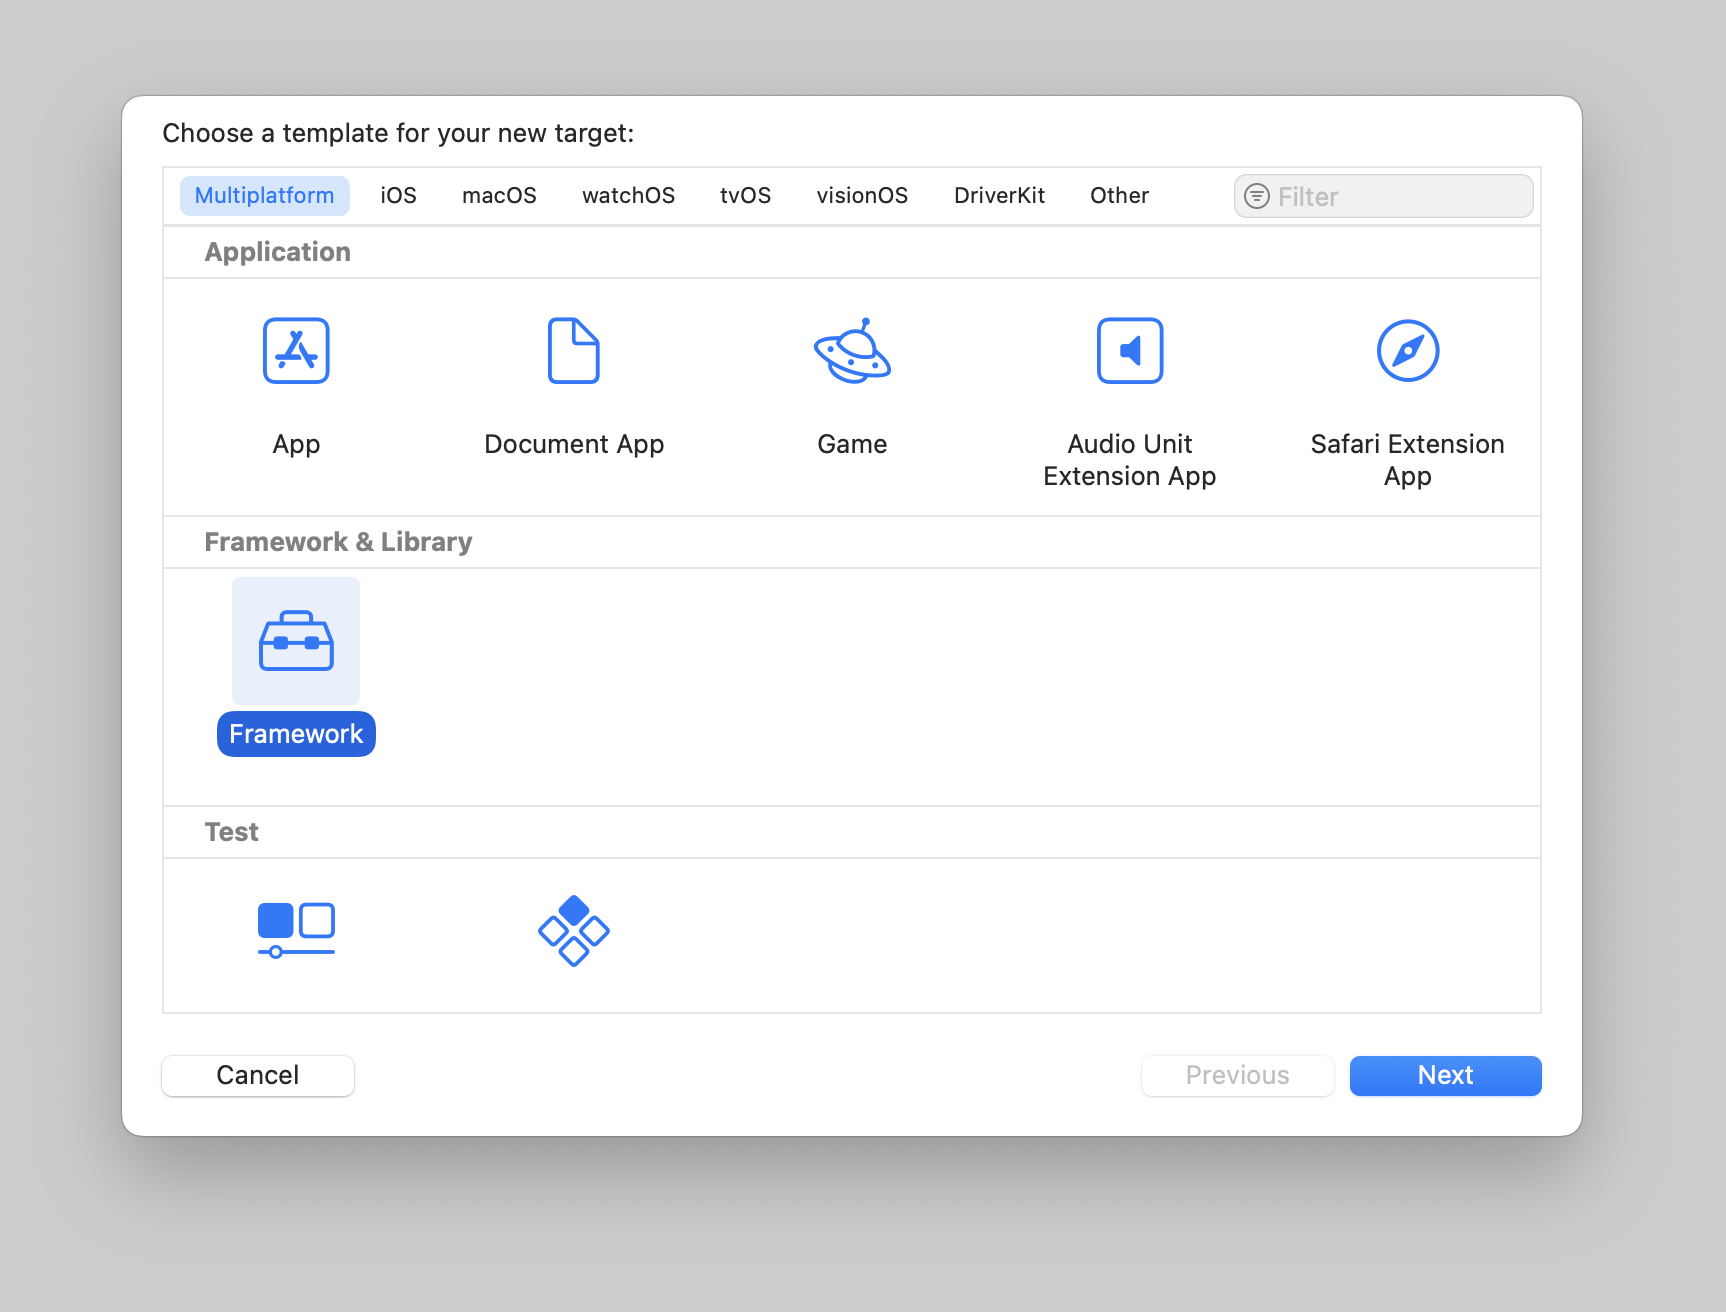
-
Give your framework a unique name. You'll use this name when adding it to your main app
-
Right-click the framework folder and select
Convert to Group. CocoaPods doesn't work properly with references. Perform this step for both<FrameworkName>and<FrameworkName>Testsfolders.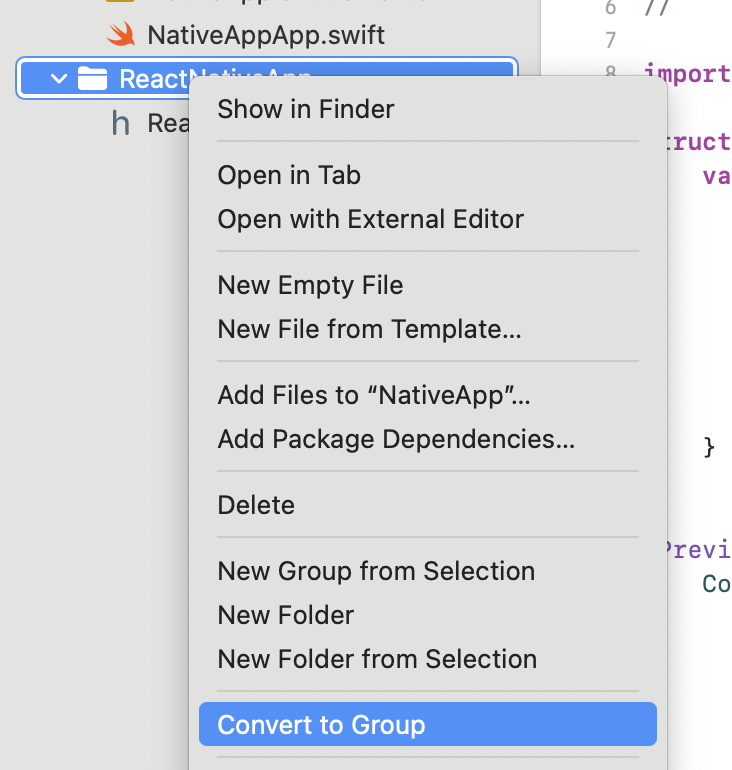
-
Set these build settings for your framework:
Build Setting Value What it does Build Libraries for Distribution YES Creates a module interface for Swift. Also checks if the framework works with your Xcode version. User Script Sandboxing NO Lets scripts modify files, which we need to create the JavaScript bundle. Skip Install NO Makes sure Xcode creates the framework files we need. Enable Module Verifier NO Skips testing the framework during build, which makes builds faster.
2. Update CocoaPods in your React Native app:
-
Add your new framework to
ios/Podfile:Podfile
3. Add the Bundle Script:
- In Xcode, click on your React Native app target
- Go to Build Phases
- Find the
Bundle React Native code and imagesstep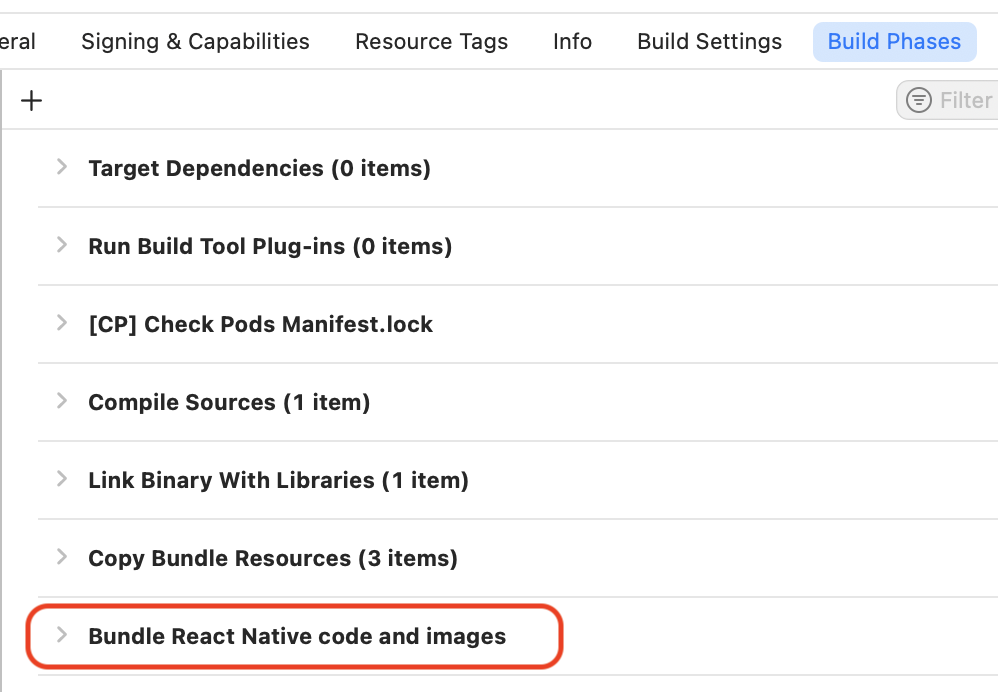
- Copy the script from there
- Click on your framework target
- Go to Build Phases
- Click the + button and choose
New Run Script Phase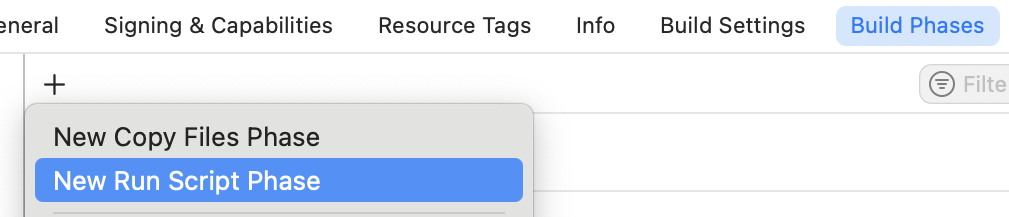
- Paste the script you copied
- Name the phase
Bundle React Native code and images - Add these files to the script's input files:
$(SRCROOT)/.xcode.env.local$(SRCROOT)/.xcode.env
4. Create the Framework's Public Interface:
- Install React Native Brownfield library:
- Create a new Swift file in your framework folder using Xcode with the following contents:
5. Setup Rock's brownfield plugin:
-
Add
@rock-js/plugin-brownfield-iosto your React Native project -
Add this to your
rock.config.mjs:rock.config.mjs
6. Create the XCFramework
Run the following command in Terminal to compile frameworks for Hermes, React Native Brownfield library, and your app:
If you want to run the React Native app independently from the native iOS app, you'll still need to run the package:ios command and add the ReactBrownfield.xcframework to the project, as instructed in step 7.
Otherwise, the run:ios command will fail with:
7. Add the Framework to Your iOS App:
-
Open the
.rock/cache/ios/packagedirectory and drag the following files into your app's Xcode project (you can select all at once): INFO
INFOXcode builds depend on files being referenced in the project file. If you create a new source file without using Xcode, your file is not going to be referenced by the project.
-
Initialize React Native in
AppDelegate.swiftand show it usingReactNativeViewControlleravailable from React Native Brownfield library:AppDelegate.swiftNOTEInstead of using
AppDelegateyou can also useSceneDelegate8. Run your native iOS App
Now that you have everything set up, you can run your app in Debug or Release configuration, and it will display a React Native app we just packaged with
package:ioscommand.Debug configuration
When running in Debug, React Native Brownfield will expect you to run a JS dev server.
You can do so by running
startcommand in your Terminal app:Release configuration
When running in Release, React Native Brownfield will load the JS bundle (
main.jsbundle) directly from the release XCFramework file without requiring you to run any JavaScript tooling.